
All posts in Home Decor
True Patriot Love: Canada Day Party Planning
From the maple leaf in our logo, to our consistent chatter about supporting local, we are a group of women who couldn’t be prouder to be Canadian. And among the things […]
Last minute hostessing tips for New Year’s
Oh. No. It’s the eve of New Year’s eve and you’re absolutely regretting volunteering your home for hosting the ultimate bash to ring in the New Year. Don’t hate on […]

Cozy Winter Home Essentials
As the wise, wise Fergie once said, “let’s get it started” – the season of painfully cold mornings, taming hat hair, dollars spent on down-filled bundling and a whole lot […]

DIY Cork Board for the Wino in all of us
There’s nothing like exploiting your favourite indulgence for a crafty afternoon and a new masterpiece to adorn your walls. After many months of collection and consumption, and many subsequent months […]

Re-Vamp your Space for Spring
Last year, Mother Nature was much kinder to us than she has been this year. At the end of March 2012, I wrote about Spring Cleaning to go along with […]
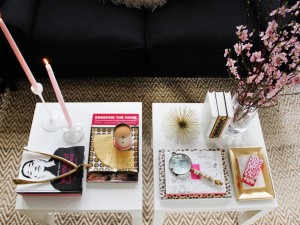
Coffee Table Couture
After watching Emily Schuman’s adorable tutorial on how to style a coffee table , I began thinking about how I would decorate my own if I wasn’t, pitifully, still living […]

Re-Decorating with Colour
As some of you may know, all 5 of us nuts have moved since the beginning of 2012. While Kaylee and Jess are now both calling Toronto their new home, Catherine, Kate and I have all re-located within the Nation’s Capital. Moving is never an easy venture (it is actually known as one of the …

Spring Cleaning
Well folks, even though earlier this week I wrote about my favourite patios to go along with the summer-like weather we’ve been having, really and truly, it’s spring. And, what […]
Recent Comments